ーArticle Levelー
- Beginner
- Importance
- Difficulty
Hey everyone, are you enjoying WordPress?
LiteSpeed Technologies is one of the plugins provided by LiteSpeed Technologies, and it is a powerful tool designed to improve the loading speed of your website.
LiteSpeed Cache is a plugin that helps with both speed optimization and SEO improvements, and it performs best in a LiteSpeed server environment.
If you’re looking to improve the performance of your WordPress site, LiteSpeed Cache is definitely one of the most recommended plugins.
In this guide, I will walk you through how to easily set up LiteSpeed Cache, even for beginners, using WordPress.
We’ll start with the basic initial setup and then explore the best settings for personal websites and multiple-site owners.
By following these steps, your website will surely become blazing fast!”
 ryo
ryoHello! I’m ryo.
 助手君
助手君I’m your assistant!
Recommended Articles:”Practical Image Optimization with Smush: Improve Your Website’s Performance“
Note: Since LiteSpeed Cache and Smush have similar functionalities, using both may result in slower site performance due to duplication.

What is LiteSpeed Cache?

LiteSpeed Cache is a plugin that makes WordPress pages load at lightning speed.
By improving page loading speed, you can also expect SEO benefits!
- Page cache image optimization
- CSS/JavaScript minification
- Browser cache utilization
- CDN (Content Delivery Network) support
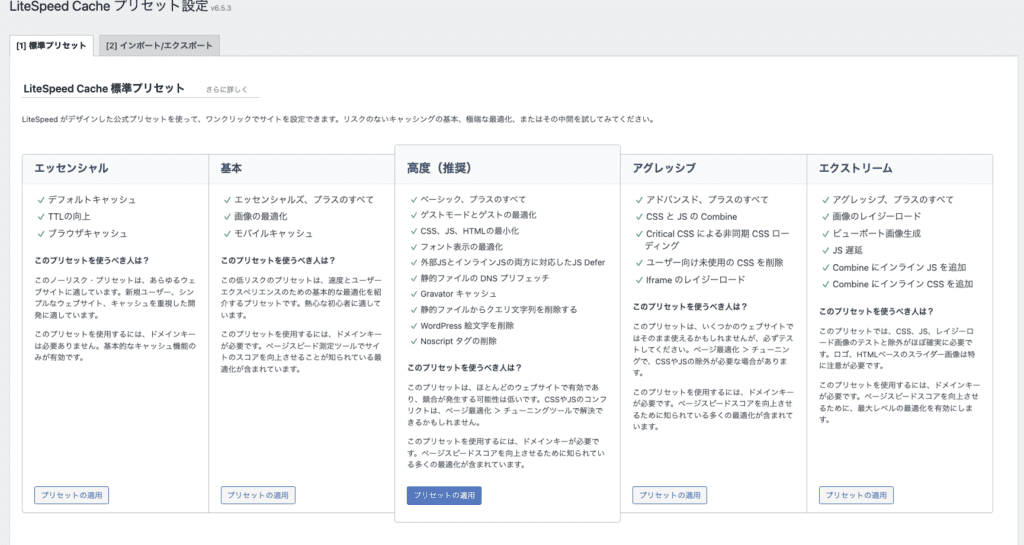
LiteSpeed Cache Preset Settings
Before the LiteSpeed Cache settings, there is actually a preset configuration (pre-configured settings).
If you’re looking to avoid the hassle of manual settings or want to test the effects immediately, trying out the preset settings might be a good option!
There are various settings available, but the recommended one is “Advanced (Recommended).”
The image below shows ‘高度(推薦)’
 ryo
ryoEven those who find the settings troublesome can easily configure it!
I tested the effectiveness of LiteSpeed Cache.
I tested how effective LiteSpeed Cache really is, and after clearing the site cache, the website speed improved dramatically.
 助手君
助手君Sure, you’d want to know how much of a difference it makes!
I tested it by pressing “Purge All (Cache)” and did the evaluation.(訳:試しに「全てをパージ(キャッシュ)する」を押して検証しました。)
※This is only with the “Advanced (Recommended)” preset settings.
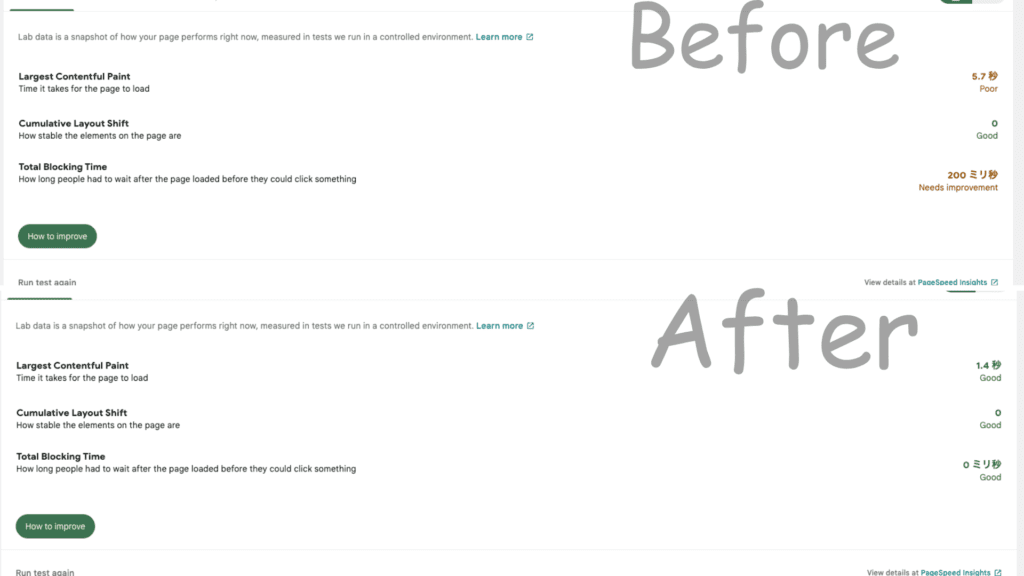
The image above shows the display speed when viewing the site on mobile (smartphone).
ryoIt’s really convenient that you can easily configure it and achieve such great results!
Since you can change the site loading time in a short period, I honestly think that detailed settings may not be necessary.
This is definitely a plugin I want to keep using in the future!
Now, from the next section, I will explain the detailed recommended settings for LiteSpeed Cache.
How to Install LiteSpeed Cache

Let’s install LiteSpeed Cache and get it up and running first.
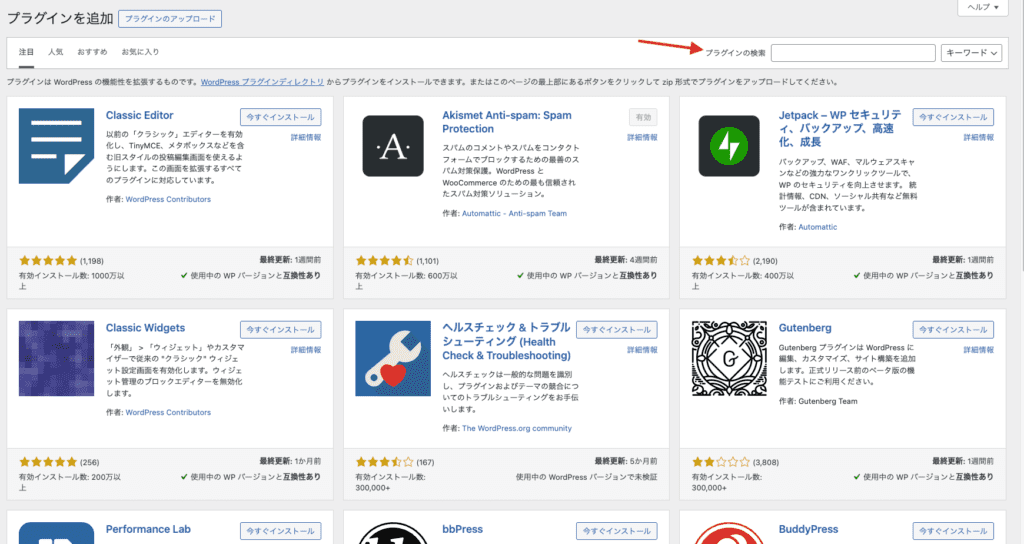
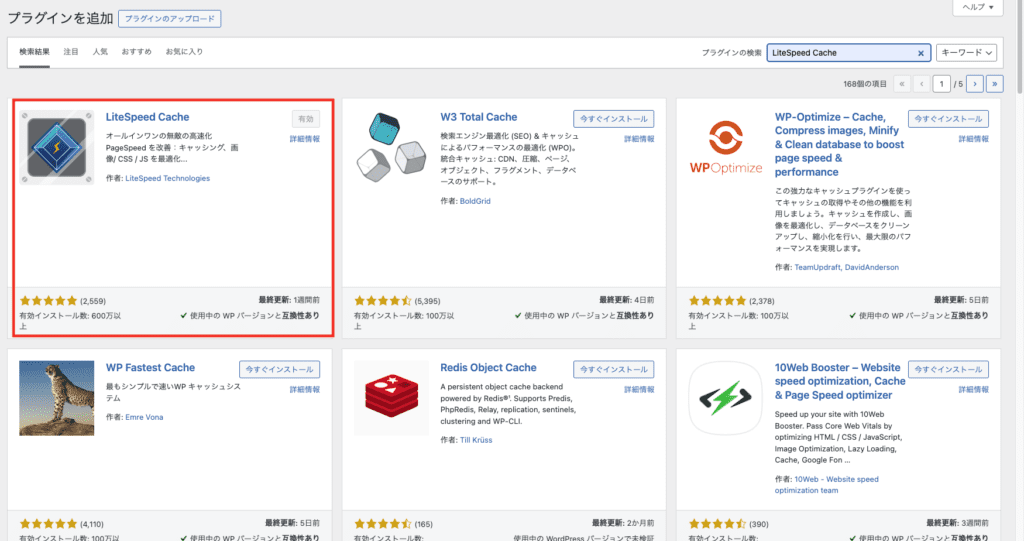
If it appears in the WordPress dashboard, you’re all set!
Initial Setup Flow: A Simple Guide to Configuring LiteSpeed Cache

First, after installing LiteSpeed Cache, let’s go over the basic initial setup steps you should follow.
 助手君
助手君Simply installing it won’t be enough to achieve its full effect, so let’s adjust the settings!
| Item | Explanation |
| Cache Settings | Basic settings for improving site speed |
| CSS Compression | Speeds up page load times |
| JS Compression | Accelerates loading times |
| JS Lazy Load | Improves initial display speed |
| Original Image Optimization | Reduces image size |
| WebP Image Conversion | Achieves lighter images |
| Browser Cache | Speeds up page visits on subsequent visits |
| Mobile Cache | Enhances mobile site display speed |
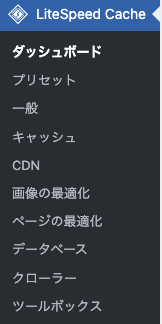
LiteSpeed Cache Basic Initial Settings
Enable Cache: Recommended Setting – Enabled

To significantly improve the website loading speed, enabling the cache function is essential. In the settings menu, go to the “Cache” tab and turn on “Enable Cache.”
CSS Compression: Recommended Setting – Enabled

By compressing the CSS, unnecessary spaces and comments are removed, reducing the file size. This results in faster page loading. Enable “CSS Compression.“
JS Compression: Recommended Setting – Enabled

By compressing JavaScript, the page load becomes smoother. Set “JS Compression” to enabled.
JS Deferred Loading: Recommended Setting – Deferred

If you want to speed up page loading with the initial settings, “Deferred” loading is effective.
Optimization of original images: Recommended setting, enabled.

Compress the original images to reduce their size and generate optimized images.
WebP image support: Recommended setting, enabled.

WebP is a lightweight image format that significantly reduces file sizes compared to JPEG and PNG. Enable “WebP Image Conversion” to improve image display speed.
Browser Cache: Recommended setting Enabled

We set it so that the browser can use the previous cache when users revisit the site. Enable ‘Browser Cache‘ to shorten reload times.
Mobile Cache: Recommended setting Enabled

This is the setting to apply cache for mobile users. Essentially, enabling mobile cache improves page loading speed when accessing from mobile devices.
Recommended settings for personal sites

For personal sites, the scale of the site is small, and management is handled by a few people, so simple and efficient settings are required.
| Item | Explanation |
| Cache Expiration Settings | Apply to content that doesn’t change frequently |
| QUIC.cloud CDN | Improves the loading speed of images and stylesheets |
助手君It’s important to strike a balance between performance and flexibility!
Optimization of cache and static files
For personal sites, content is rarely changed frequently, so strengthening cache settings to improve speed is recommended.
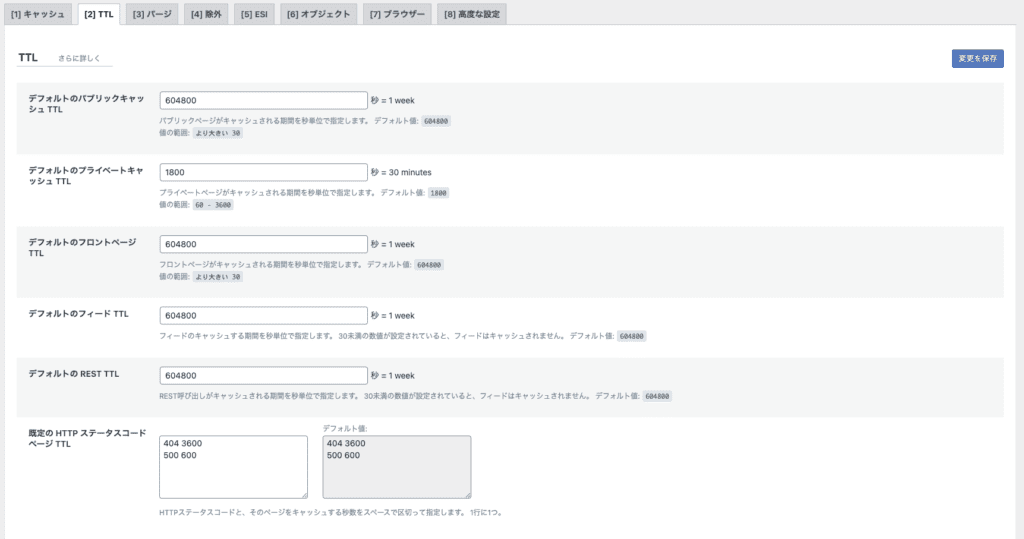
Set Cache Expiration: Recommended setting 86400 seconds (1 day).
For example, setting the cache expiration to about 1 day allows frequently unchanged content to be displayed quickly.
This improves loading speed when users revisit the site.
Utilizing CDN (Content Delivery Network)
QUIC.cloud CDN usage: Recommended setting is enabled.

Even for personal websites, using QUIC.cloud can streamline content delivery and display the site more quickly.
By using QUIC.cloud, especially the loading speed of images and stylesheets improves.
Note that QUIC.cloud CDN requires obtaining a domain from the general settings of LiteSpeed Cache.
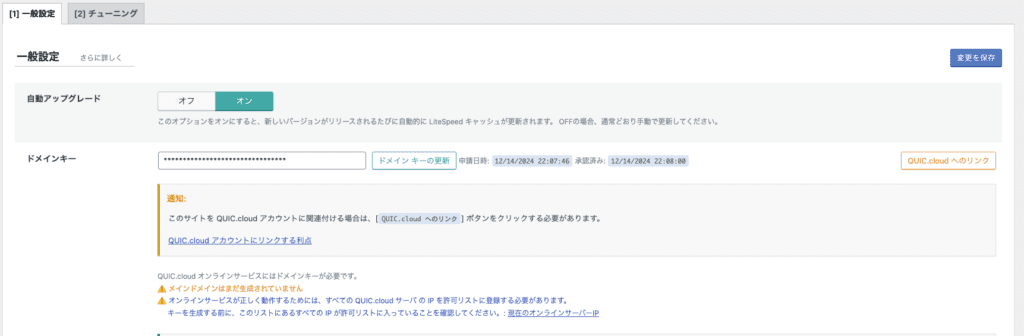
By clicking “Request Domain Key,” a domain key will be automatically assigned, and you will be able to use the service immediately.
Settings for multi-person managed sites

For sites managed by multiple people, settings that provide an efficient working environment while maintaining performance are required, as multiple editors and contributors are involved.
| Item | Explanation |
| Cache Settings | User-specific Cache |
| Role-based Cache Clearing | Automatic Cache Clearing |
| User Cache Settings | Cache for Logged-in Users Only |
ryoIt’s important to optimize for each site and streamline cache management.
Cache Settings
Cache per user (Cache for logged-in users): Recommended setting – Enabled

When multiple people are managing a site, it’s important to manage the cache settings for editors and administrators individually.
This ensures that changes made by administrators do not affect the cache of other users.
Enabling the “Cache for logged-in users” allows you to separate and manage the cache for administrators and regular users.
 助手君
助手君For example, in cases where there are multiple administrators, issues may arise where changes made by Administrator A are not reflected for Administrator B, causing potential conflicts or confusion.
- Why is it important?
・The work of administrators will not affect other users.
For example, it prevents issues where the page before editing is displayed after the administrator edits an article.・The actions of logged-in users will become smoother.
Since each logged-in user uses independent cache, the work of Administrator A will not interfere with the work of Administrator B.・Improved security
Since each logged-in user is provided with their own cache, the risk of other users’ data being mistakenly displayed is reduced.
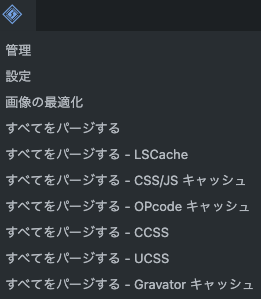
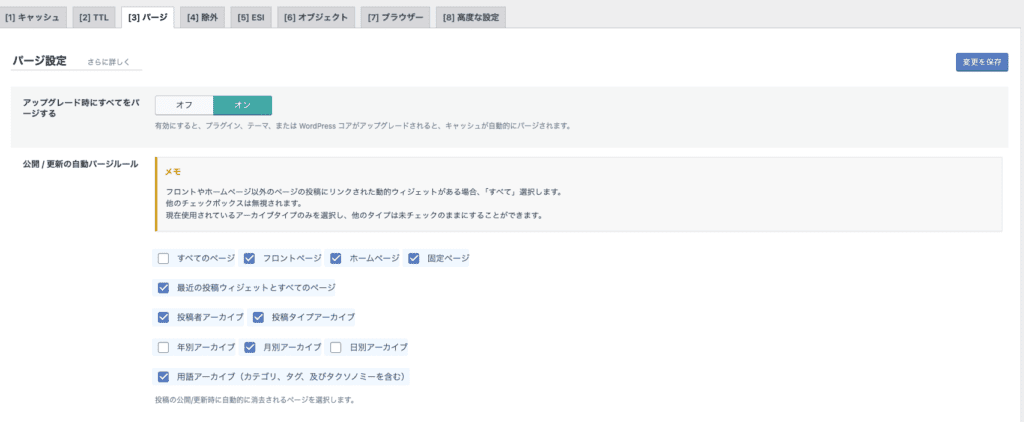
Role-based cache clearing
Automation of cache clearing: Set it up so that only the cache related to the content updated by specific users is cleared when posts or pages are edited. This way, you won’t need to clear the entire site’s cache every time, helping to maintain performance efficiently.
You can select the items for automatic cache clearing as shown in the image below.
 ryo
ryoWhen an administrator updates a page, the cache for the entire site is cleared, but when an editor edits an article, only the cache for that specific article is cleared.
- Why is this important?
・Prevents clearing the entire cache
Even if part of a post is edited, the cache of the entire site will not be cleared, significantly improving performance.・Customize operations based on roles
For example, “editors can only clear the cache for specific posts, while administrators can clear the cache for the entire site,” allowing for role-based distinctions.
User Cache Settings
Login User-Specific Cache: On sites with multiple users, it’s important to set up cache specifically for logged-in users.
This ensures that the cache applied is tailored to the content the user is viewing, optimizing performance.
Enable the following option
- “Cache Logged-in Users“: Creates a separate cache for each logged-in user.
- “Cache Comments” (if needed): Creates a cache specifically for users who have posted comments.
This way, different caches will be applied to editors and administrators.
It also accommodates scenarios where different dashboards and customizations are applied to each user, ensuring that changes made by administrators do not affect the cache of regular users.
As a result, performance optimization and improved stability can be expected!
Points to Note and Troubleshooting During Setup

When setting up LiteSpeed Cache, there are a few important points to keep in mind.
 助手君
助手君You need to pay attention to the cache clearing timing and the exclusion of dynamic content from the cache.
Cache clearing timing
Note: If you frequently update content, it is important to manually clear the cache. Especially when editing articles or pages, displaying old cache can result in incorrect information being shown to users.
1.Cache clearing omission during content updates
Reason
If old caches remain after updating an article or page, outdated information will be displayed to users. This is particularly critical for sites that require timely updates, such as news or event information.
Solution
Ensure manual cache clearing is done thoroughly (Execute from “LiteSpeed Cache” → “Cache” → “Cache Management”).
Set up automatic cache clearing during updates (LiteSpeed Cache has a feature that automatically clears the cache when posts are updated, so enabling this feature is recommended).
2. Failure to Set Regular Cache Clearing
Reason
If caches remain for too long, issues can arise where the site doesn’t update as intended. This is especially problematic for sites with frequently changing dynamic content, as regular cache clearing is essential.
Countermeasures
- Automate regular cache clearing (Use the scheduling feature in LiteSpeed Cache to set up daily or frequency-based clearing).
- Adjust the frequency of automatic clearing according to operational needs, such as “once a day” or “once a week.”
Dynamic content cache
Note: It is important to configure the cache settings so that dynamic content, such as user account pages or shopping cart contents, is not cached for each user.
If dynamic content is cached, logged-in users may see data from other users.
1. Incorrect Cache Settings for Logged-in Users
Reason
There is a possibility that logged-in users may see other users’ information (such as account details or purchase history), so pages for logged-in users should not be cached.
Solution
- Disable the “Cache for Logged-in Users” in LiteSpeed Cache.
- Check the setting to “Disable cache for logged-in users” under “LiteSpeed Cache” → “Cache” → “Cache Control”.
2. Misconfiguration of Dynamic Content Cache Control
Reason
If dynamic pages (such as cart, search results, or user-specific content) are cached like static pages, there is a possibility that other users’ information may be displayed incorrectly.
Solution
- Disable the cache for REST API (as dynamic content is often managed through the REST API).
- Go to “LiteSpeed Cache” → “Cache” → “REST API Cache Settings” and disable it.
- Specify URLs to exclude specific pages from being cached (using LiteSpeed Cache’s “Cache Exclusion List”).
CSS/JS Optimization Settings
Note: When performing CSS and JS compression or merging, errors may occur, especially with certain themes or plugins.
Enabling compression and merging settings may cause unexpected layout issues or functionality problems.
1. Occurrence of layout issues and functionality problems
Reason
CSS and JS compression/merging are important measures to improve site loading speed, but some themes or plugins may behave unexpectedly. This can lead to layout issues or functionality problems.
Solution
- Disable compression/merging settings (check each one individually)
- Exclude specific CSS/JS (LiteSpeed Cache offers the ability to exclude individual scripts)
2. Display delays or errors due to compression
Reason
During the compression process, invalid code or missing dependencies may occur. This is often caused by third-party scripts or plugins.
Solution
- Clear the cache (ensure the page is displayed in its most up-to-date state)
- Identify the problematic JS or CSS (use the “Console” tab in DevTools to check which scripts are causing errors)
Image Compression Settings
Note: When setting image compression, if the compression rate is too high, the image quality may decrease. It’s important to strike a balance between image quality and file size.
- Original Image Optimization: This setting optimizes the image and saves a backup of the original in the same folder. This ensures that if any issues arise with the compressed image, the original image is preserved.
- Lossless Optimization: This method compresses the image while preserving the quality, reducing its size. With this setting, the image quality is maintained compared to lossy compression, but the compressed image size may be larger.
- WebP Image Conversion: This converts the original image into the WebP format for compression. WebP typically offers better compression rates than JPEG or PNG, which can improve site loading speed.
These settings are directly related to the management of image compression and optimization.
1. Image quality degradation
Reason
If the image quality deteriorates, it can significantly impact the visual appeal of the website. This is especially critical for sites where visuals like product images or portfolios are important.
Key measures
- Enable lossless optimization (to maintain image quality)
- Ensure backup of original images (for recovery if needed)
2.Changes not reflecting after page update
Reason
Users may feel distrustful if they feel like “nothing has changed even after making adjustments.” Cache-related issues are a common pitfall for beginners. Key measures:
- Clarify cache clearing procedures (clear both LiteSpeed Cache and browser cache)
- Review dynamic content cache management (consider separating cache for logged-in users if necessary)
LiteSpeed Cache helps improve site performance, but careful attention is needed when configuring and troubleshooting.
By properly managing cache clearing, dynamic content, CSS/JS optimization, and image compression, you can provide a smooth user experience.
Finally! Performance Check and Testing

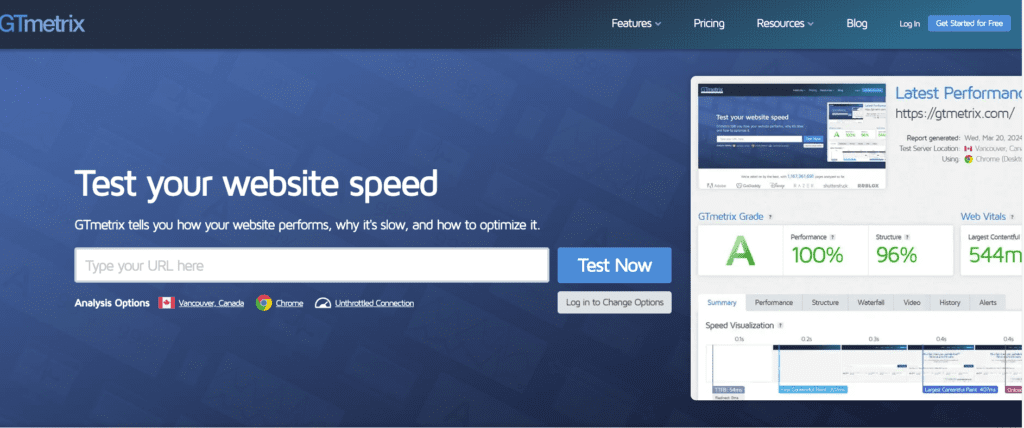
Once the setup is complete, let’s test the actual performance of your site. Use the following tools to check the page load speed.
GTmetrix: Analyzes the site’s loading speed and suggests improvements.
Pingdom: It measures the site’s response time and performance.
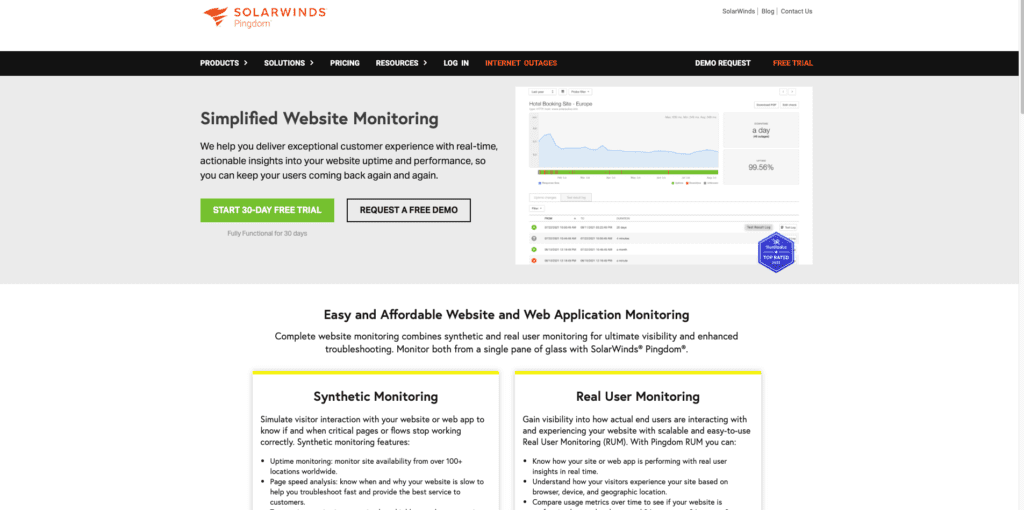
Google PageSpeed Insights: Check the performance score based on Core Web Vitals.

Based on the test results, make necessary adjustments to the settings and further improve performance.
Summary: Let’s Speed Up Your Site with LiteSpeed Cache!
The LiteSpeed Cache plugin is a powerful cache management tool that significantly improves the performance of WordPress sites.
Key features include page caching, browser caching, image optimization, and CSS/JS compression and concatenation, all of which optimize site loading speeds.
For both personal and multi-user sites, it’s essential to configure settings according to their specific needs.
However, the preset settings are already sufficient for optimizing your site. For those who want to fine-tune, you can leverage basic cache settings, CSS/JS compression, and the use of a CDN to speed up your website even more!