ーArticle Levelー
- Beginner
- Importance
- Difficulty
Hey everyone, are you enjoying WordPress?
“Is Your WordPress Site Still Slow?“
A slow WordPress site can increase your visitor bounce rate and negatively impact SEO. That’s why optimizing images is crucial for improving site speed.
Smush is a free image compression tool. In this article, we’ll cover everything from its basics and usage to the benefits of the premium version.
 ryo
ryoHello! I’m ryo.
 助手君
助手君I’m your assistant!
*Smush is free to use, but some features are only available in the premium version.
Related Articles: “Complete Guide to LiteSpeed Cache for Beginners“

What is Smush? Easily Optimize Images with Just One Tool!

Smush is a WordPress image optimization plugin that helps improve your site’s loading speed.
By compressing and optimizing the size of your images, you can significantly boost your site’s loading speed.
Optimizing images enhances your site’s loading speed, which in turn improves the user experience (UX).
- Image Compression Methods: Smush supports both lossless compression (compressing without losing quality) and lossy compression (slightly reducing quality to achieve higher compression rates), so you can choose based on your needs.
- Automation Feature: Smush automatically compresses images when you upload them, making optimization effortless.
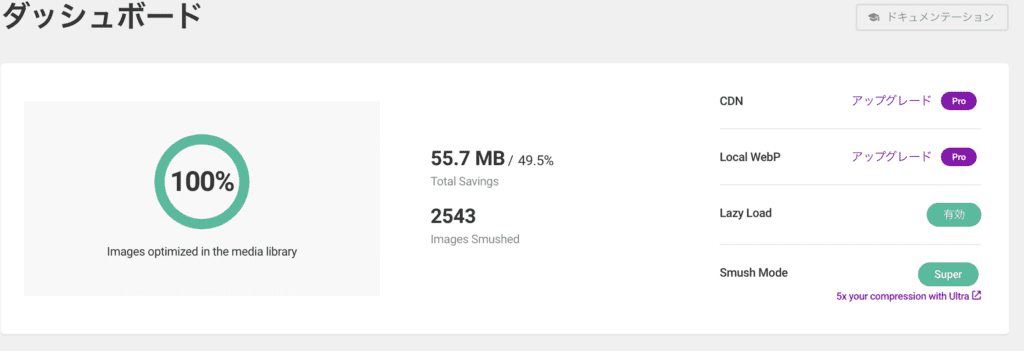
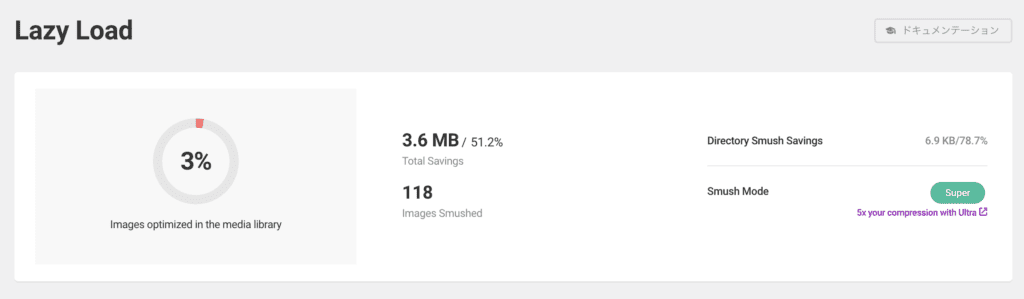
Smush Implementation Results
After trying Smush’s free version, I was amazed at how much the site speed improved.
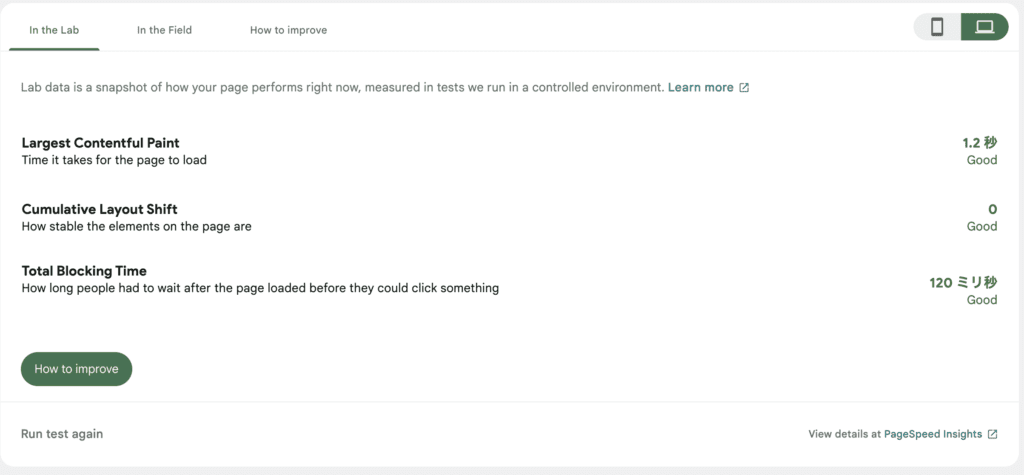
There are several time-related items listed, which are
・Largest Contentful Paint
・Cumulative Layout Shift
・Total Blocking Time
These factors are directly linked to SEO and UX (User Experience), making them essential for website management.
 助手君
助手君This is definitely worth trying!
Benefits of the Premium Version (Pro)
CDN Feature
- Smush’s CDN (Content Delivery Network) allows images to be served from multiple servers, enabling faster image loading even for global users.
- This is particularly useful if your site is targeted at multinational users.
WebP Support
- By converting to the next-gen WebP format, the compression rate of images increases, improving site loading speed. This helps improve Google PageSpeed Insights’ ratings, such as “Properly Size Images.”
Speed Improvement
- By combining CDN and WebP conversion, image loading times are drastically reduced, improving page load speed. Faster page loading increases user engagement and benefits SEO.
Efficient Bandwidth Usage
- By delivering compressed images, bandwidth usage is optimized, reducing server load. This is especially important if you are running the site on your own server.
| Feature | Free Version | Premium Version (Pro) |
| CDN Feature | ❌ Not Available | ✅ Available |
| WebP Support | ❌ Not Available | ✅ Available |
| Image Compression Limit | 50 images per batch | Unlimited |
| Backup Feature | ❌ None | ✅ Available |
In what cases is the premium version especially effective?
1. When you are using a large number of images
For sites with many images, such as e-commerce sites, portfolio sites, or blogs, where page speed is crucial.
2.When SEO is a priority
Site loading speed has a significant impact on SEO. By improving speed, you may enhance your ranking on search engines.
3.When you have global users
Using a CDN allows you to deliver images quickly to users internationally.
If you want to maximize site performance and SEO benefits even for a personal website, the premium version of Smush is highly recommended. Especially for sites where page load speed is critical, it is worth the investment.
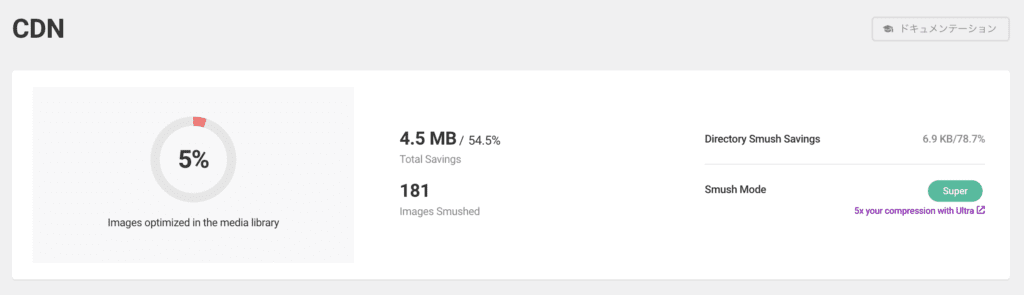
The following image shows the results obtained from “WPMU DEV ,” as posted by the creator.
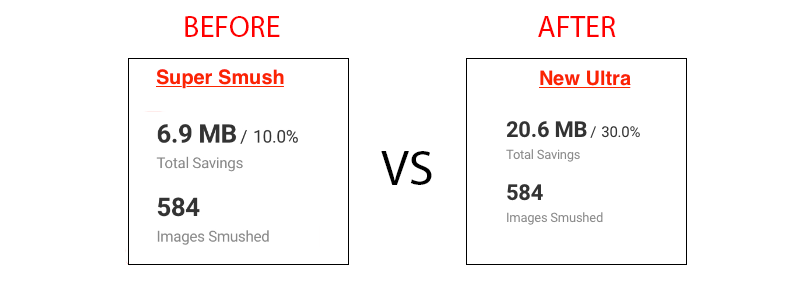
There is such a significant difference between Super and Ultra (Pro).
 助手君
助手君However, if you find Smush useful after trying the free version, it might be a good idea to consider upgrading to the premium version.
Smush Pro is especially ideal for sites with many images, those that prioritize page speed and SEO, and sites with global access.
By automating image compression and optimization, and utilizing CDN features and WebP conversion, you can dramatically improve your site’s performance.
How to Install and Set Up Smush
Alright, let’s start with the installation of Smush!
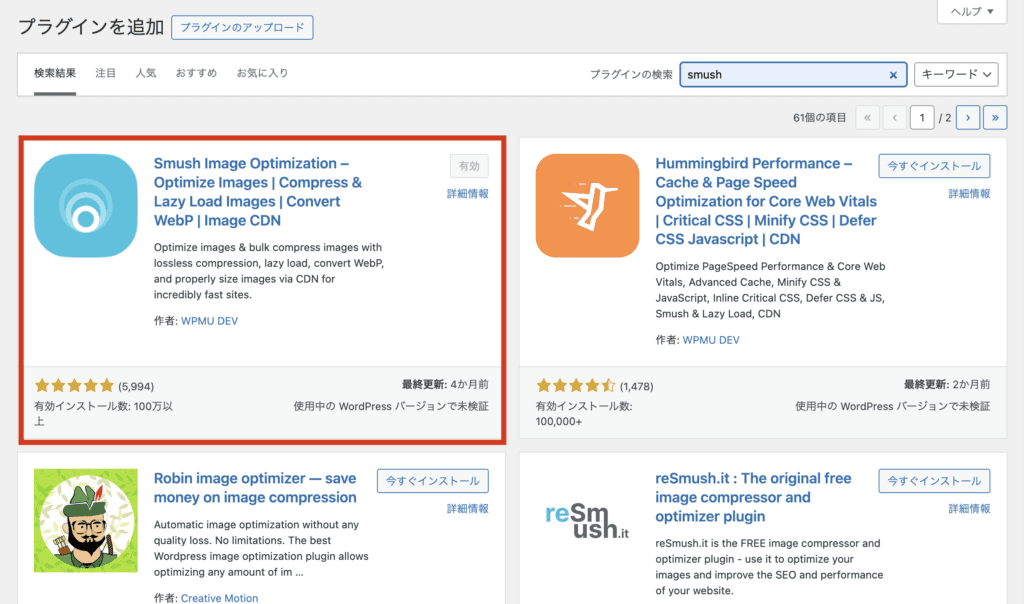
Installing Smush
- Log in to your WordPress dashboard.
- Go to “Plugins” → “Add New” and search for “Smush.”
- Install and activate “Smush Image Optimization.”
Check Basic Settings
- When you access the Smush settings page, you’ll find a simple initial setup. Here, you can configure image compression methods, size limits, and more.
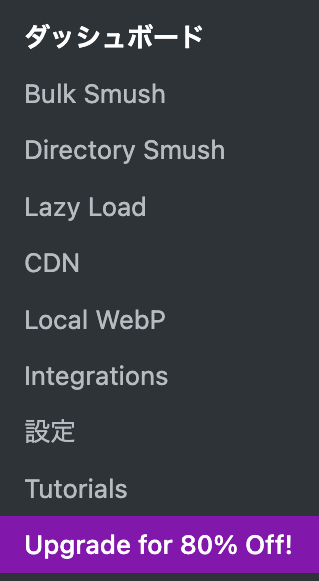
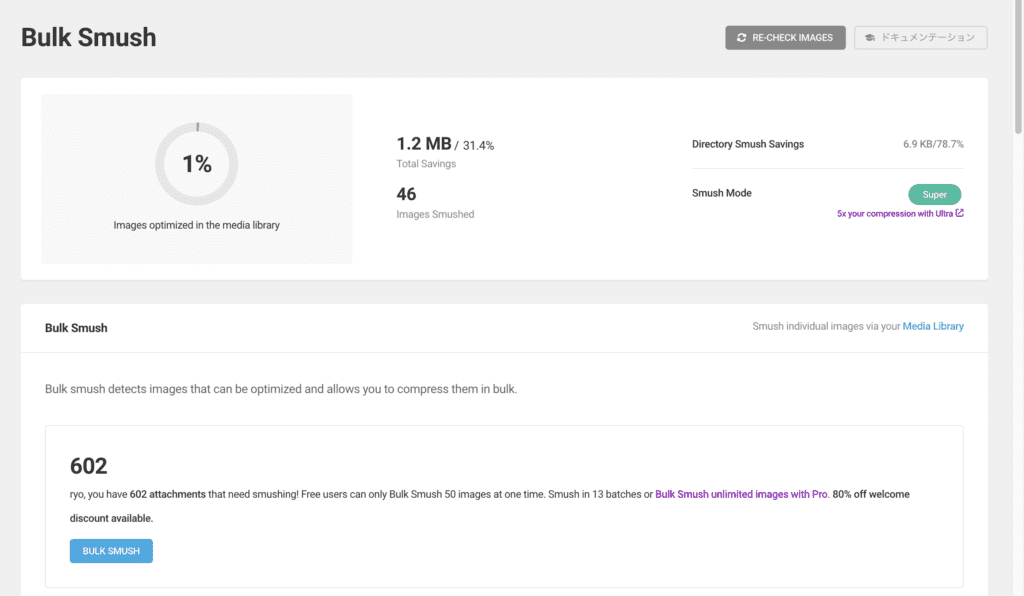
Explanation of Smush’s “Bulk Smush”

By using Bulk Smush, you can compress all previously uploaded images in bulk, dramatically improving your site’s performance. Here, we will explain the step-by-step process for setting up Bulk Smush.
The screen during the compression process looks like this↓
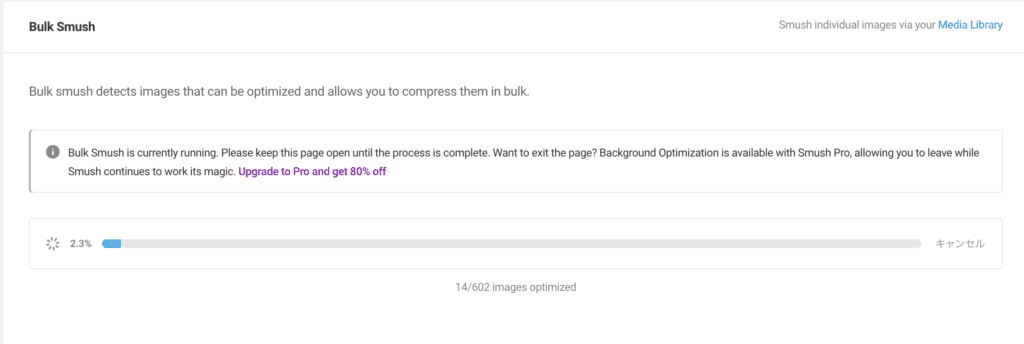
The result is…
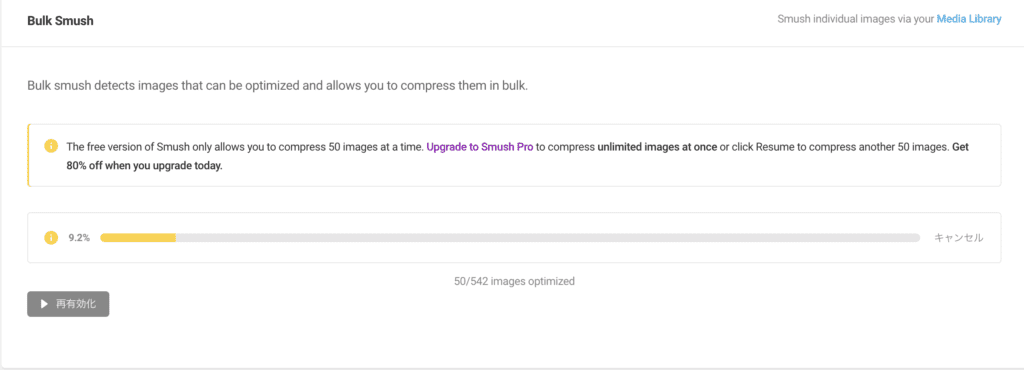
 助手君
助手君With the free version, it stops after 50 images, so it’s a bit of a hassle.
How to set up Bulk Smush
1.Smush Mode
2.Select Image Size
3.Enable Auto Compression
4.Remove Metadata
5.Image Resizing
6.Original Images
7.Email Notification(Pro version only)
8.Bulk Restore
1.Smush Mode
With Bulk Smush, you can choose from three compression levels: “Basic,” “Super,” and “Ultra.” Let’s take a closer look at each compression level.

- Basic: Performs basic compression with minimal impact on image quality. The file size is moderately compressed, making it ideal for those who want to maintain image quality.
- Super: Uses lossy compression to significantly reduce file size. The image quality is slightly affected, but it’s perfect for reducing large file sizes.
- Ultra: Provides the highest compression rate, greatly improving site load speed. While image quality may drop slightly, it offers the most effective compression.
ryoIf you want to try it out, “Super” is recommended.
This might be specific to my case, but when I set it to “Super,” the page speed of my site worsened, so be sure to check the site speed after making any changes to the settings!
The site speed returned to normal when I switched it to “Basic.“
Individual Site Settings:
- If you prioritize page loading speed and image quality, it is recommended to choose either “Super” or “Ultra.
” Especially “Ultra” has a significant impact on improving site speed.
Multiple Site Settings
- If you are managing multiple sites, it is ideal to use “Ultra” for overall performance improvement.
By standardizing the compression level when bulk compressing across multiple sites, you can ensure consistent performance across all sites.
2.Image Size Selection(画像サイズ)
WordPress generates multiple thumbnails (thumbnail images) for the images you upload. With Bulk Smush, you can choose whether to apply compression to these thumbnail sizes.

- All:(すべて) Applies compression to all thumbnail sizes.
- Custom(カスタム): Compresses only specific thumbnail sizes.
3.Enable Automatic Compression
Enabling the automatic compression option will automatically apply compression every time a new image is uploaded. By turning on this setting, you no longer need to manually compress images, allowing for more efficient optimization.

- Enable automatic compression: Automatically compresses uploaded images.
4.Metadata(メタデータ)
Images may contain EXIF data (such as capture date, camera information, location data, etc.).
By removing this metadata, you can reduce the image file size. Smush offers an option to remove EXIF data, but metadata related to SEO is not removed.

- Remove metadata: Removes EXIF data from the image.
5.Image Resizing
Image Resizing allows you to automatically resize uploaded images by specifying a maximum width or height.
This feature helps adjust the multiple thumbnail images created by WordPress to appropriate sizes, improving the site’s performance.
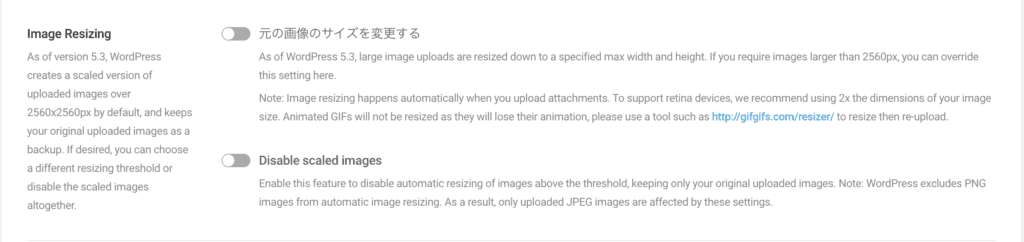
Change the size of the original image(元の画像のサイズを変更する)
When enabled, you can specify the maximum size for uploaded images. By default, WordPress automatically resizes images that exceed 2560x2560px. You can adjust this setting to resize images to a smaller size.
Disable scaling images
Enabling this setting disables the automatic resizing of images that exceed the specified size. You can keep the original image size without any resizing. Note that this setting does not apply to PNG images.
6.Original Images
Original Images is an option that allows you to decide how to optimize the original images that are uploaded.
By utilizing this setting, you can optimize the original images efficiently and improve the performance of your site.
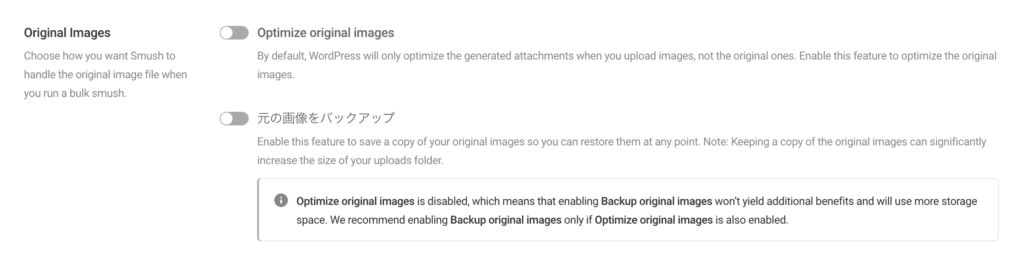
- Optimize original images: By enabling this option, the original images will also be optimized. This will compress all images and improve your site’s loading speed.
- Backup original images(元の画像をバックアップ): Enabling this option will back up the original images before optimization. However, you need to consider that storing backups will consume disk space.
7.Email Notification(Pro version)
By using Email Notification, you can receive an email notifying you when the image optimization process in Bulk Smush has been completed, even while it’s running in the background.

This allows you to monitor the progress of image optimization in real-time and move on to the next step once the task is completed.
| When to use it | Criteria for determining whether it’s worth using |
|---|---|
| 1When you frequently perform image optimization 2.When you manage multiple sites 3.When you want to automate the optimization process 4.When the tasks take a long time to complete | 1.When the workload is heavy 2.When you want to improve efficiency 3.When you have a budget to spare |
8.Bulk Restore(一括復元)
The Bulk Restore feature is a function in Smush that allows you to revert optimized images to their original state. This can be useful if the optimization did not go as expected or if you need the original image quality.
Specifically, you can restore the thumbnails (thumbnail images) of the optimized images back to their original state.

Enable Bulk Restore Feature
This feature is used when you have optimized images in Smush, and the image quality has degraded or you need to restore the original thumbnail images for some reason.
By enabling this setting, you can revert the optimized thumbnail images back to their original state.
Setup Steps
- Click on “Restore Thumbnails” to start the bulk restore process.
Restoration Process: When performing a bulk restore, Smush will regenerate the original image thumbnails from before optimization and revert them back to their original state.
However, the quality of the restored images depends on the original images, so if optimization was enabled, the image quality may change after restoration.
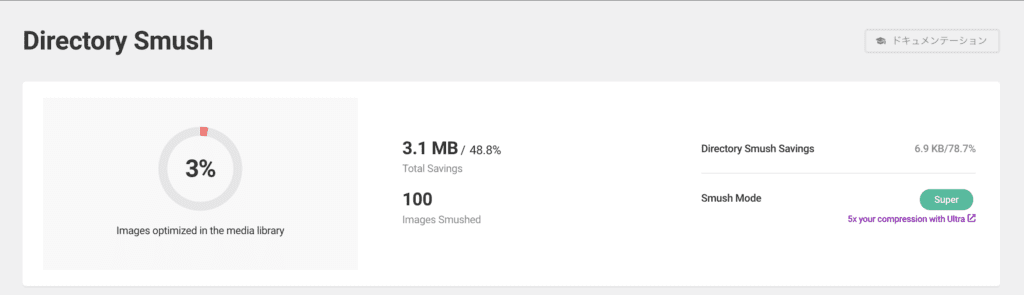
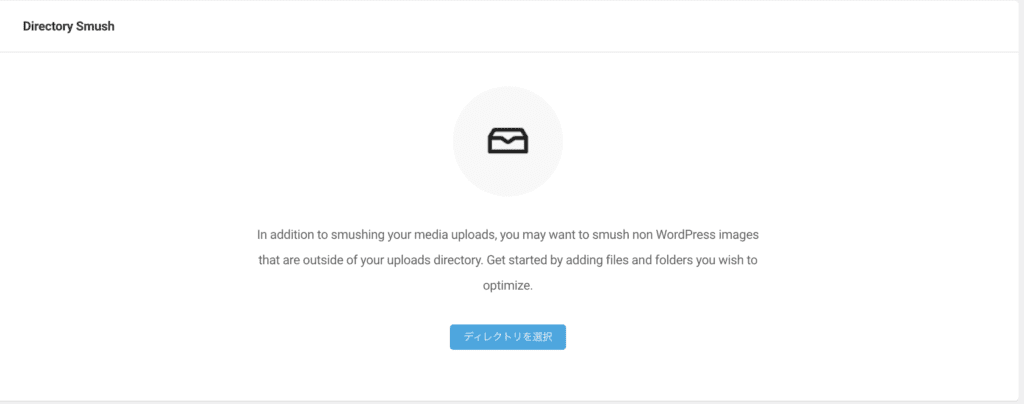
Directory Smush

Directory Smush is a tool for optimizing image files stored outside of the WordPress media library.
For example, if images are stored in theme or plugin folders, or in custom directories, you can bulk optimize these images.
1. When you want to compress images outside of the media library.
2. When you want to save server storage space.
3. When you want to improve image loading speed.
4. When you want to reduce the effort of image compression.
5. When you want to bulk compress images within subdirectories.
Unselectable directories
- The
wp-adminandwp-includesdirectories cannot be selected as they contain WordPress core files. - These are system files for WordPress and do not require image compression, so they are not available for selection in Smush.
Selectable Directories
wp-content
This directory contains themes, plugins, and uploaded media files. You can compress images stored here.
wp-content/uploads
This folder stores the images and media files uploaded by users.
Since Bulk Smush automatically processes this directory, it cannot be selected.
However, other directories (such as images within theme folders or plugin folders) can be manually selected for compression.
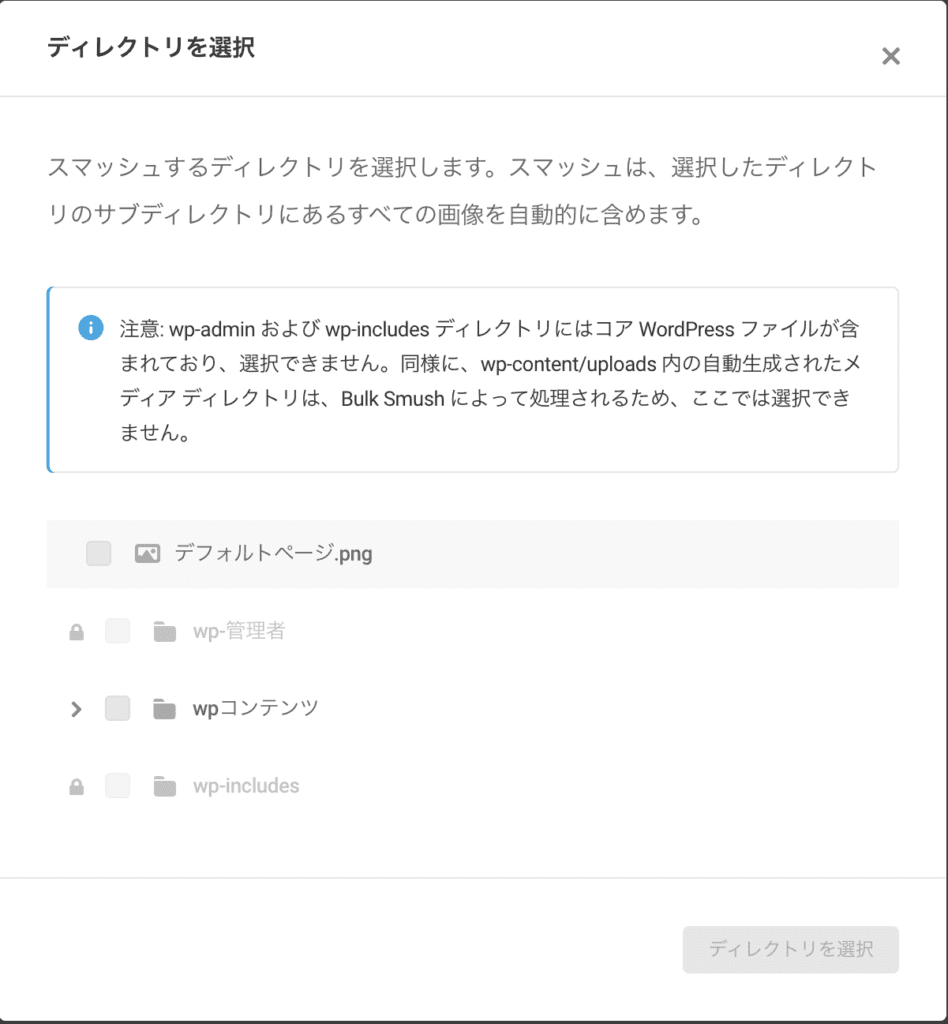
Selectable image files
If image files like “default_page.png” are displayed, those are the images you want to compress. By selecting these, you can optimize the image.
Select a directory
- Finally, click “Choose directory” to select the directory you want to optimize.
Bulk optimization: If you’re managing multiple sites, you can compress images outside the media library of each site at once, which reduces the operational burden.
Efficiency: If you’re running multiple WordPress sites on the same server, selecting a shared image directory and compressing it will allow you to optimize images across all sites efficiently.
Performance improvement: When you have many sites, compressing images on each site will improve overall site performance, allowing you to accommodate more visitors.
Recommended use cases
- When you’re customizing a site’s theme or plugins and want to bulk compress the additional image files.
- When you’re uploading your own designed images or icons and want to include those in the compression as well.
Bulk optimization: When managing multiple sites, you can compress images outside the media library of each site at once, reducing the operational burden.
Efficiency: If you’re running multiple WordPress sites on the same server, selecting a shared image directory and compressing it will allow you to optimize images across all sites efficiently.
Performance improvement: When you have many sites, compressing images on each site will improve overall site performance, allowing you to accommodate more visitors.
Recommended use cases
- When using a common image folder across multiple sites.
- When each site has different themes or plugins installed, and you want to efficiently compress the uploaded images on each site.
Directory Smush is a convenient feature that allows you to compress images stored outside the WordPress media library.
Even beginners can easily improve site performance and save server space. It is especially useful when your site tends to accumulate a lot of images.
Explanation of Smush’s Lazy Load

Lazy Load is a technology that loads media such as images and videos on a website just before they are about to appear on the screen as the user scrolls.
This improves the initial page load speed and enhances the user experience.
 助手君
助手君It refers to the mechanism where images and videos that are not visible when the page is opened are loaded later.
Lazy Load Setup Steps
1.Media Type
2.Output Locations
3.Display & Animation
4.Include/Exclude
5.Script
6.Native lazy load
7.Disable Noscript
8.Disable
Media type(メディアタイプ)

Explanation
You can choose which media types to apply Lazy Load to.
For example, you can enable Lazy Load for media files like images, videos, iframes, etc. Typically, it is applied to images, but you can also apply it to videos and other media as needed.
Output Locations

Explanation
This setting allows you to narrow down where Lazy Load is applied.
By default, Lazy Load is applied to all images, but you can specify particular media output locations to have more control over its application.
Display & Animation
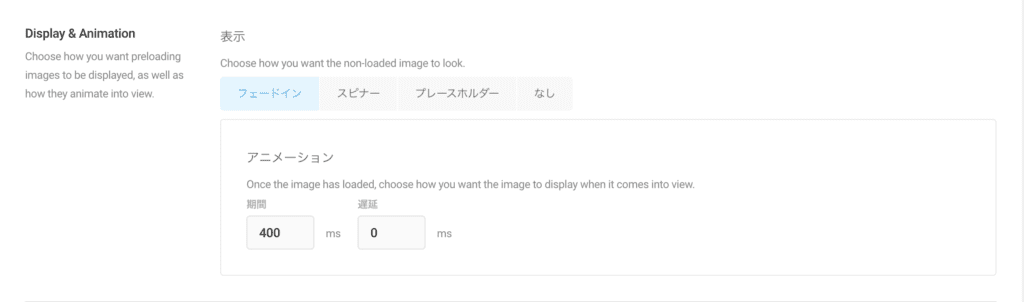
Explanation
You can choose a placeholder to display before the image is lazily loaded.
- Fade In(フェードイン): The image will fade in as it loads.
- Spinner(スピナー): A rotating spinner will be displayed while the image is loading.
- Placeholder(プレースホルダー): A placeholder image will be shown instead of the actual image.
- None: Nothing will be displayed until the image is fully loaded.
Animation Description
You can set the animation effects when the image is displayed.
You can adjust the delay time (the time until the image is displayed) and the duration of the animation (the speed at which the image appears). By default, the image fades in over 400ms, but you can adjust it as needed.
Include/Exclude
Description
You can configure settings to exclude Lazy Load from specific pages, posts, or image classes.
By specifying certain URLs, image classes, or IDs, you can exclude them from Lazy Load.
Post Type(投稿タイプ)
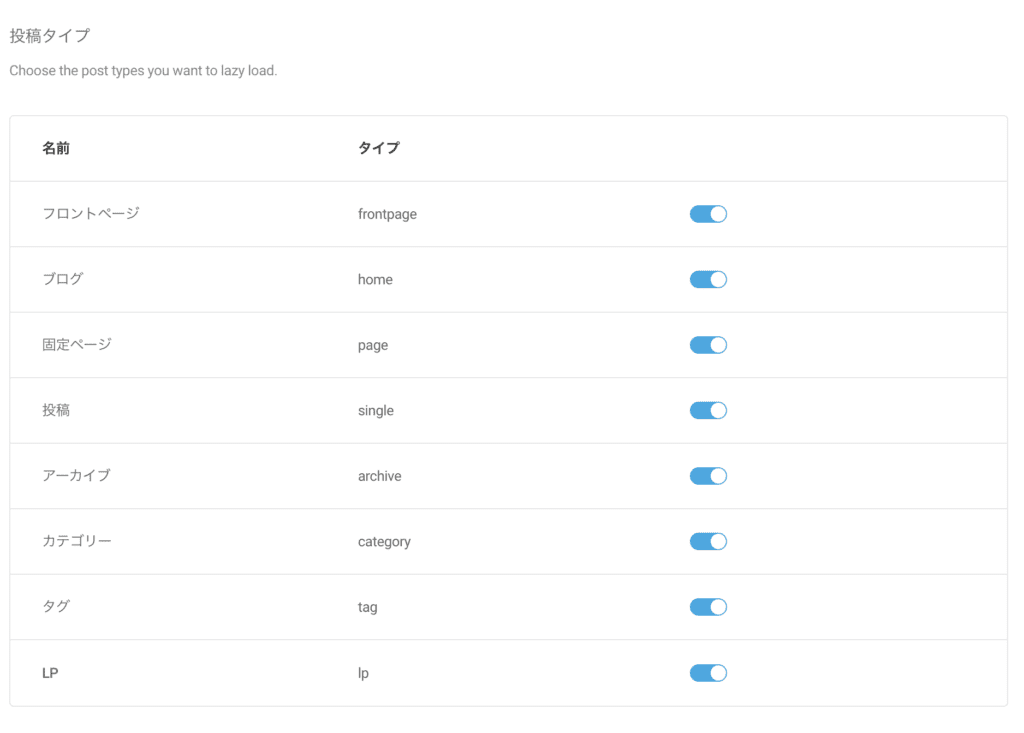
Description
You can select which post types to apply Lazy Load to.
For example, you can choose to apply Lazy Load to specific post types like “Front Page,” “Blog,” “Static Pages,” or “Posts.”
Posts, Pages, URLs(投稿、固定ページ、URL)

Description
You can manually specify the URLs of posts or static pages where Lazy Load should be excluded.
This setting is used when you want to disable Lazy Load on specific pages or URLs. For example, you can enter URLs like “/example-page” one by one.
Keywords

Explanation
You can specify the class, ID, file name, or source URL of specific images or iframes to exclude them from Lazy Load. By doing this, you can prevent Lazy Load from being applied to certain images or content.
Script(スクリプト)

Explanation
You can choose whether to load the necessary script for Lazy Load in the footer or header.
Typically, it is set to load in the footer to improve performance, but if any issues arise, it can be moved to the header.
Native Lazy Load

Explanation
This option enables the native browser Lazy Load feature.
Some browsers support native Lazy Load, and enabling this may improve performance.
7.Disable Noscript

Explanation
This option disables NoScript when Lazy Load is enabled.
NoScript is a setting that allows content to be displayed for users who have JavaScript disabled. However, when Lazy Load is enabled, this option allows you to disable NoScript.
8.Disable(無効化)

Explanation
This option allows you to immediately disable Lazy Load. By clicking this button, you can stop the Lazy Load functionality.
Example of settings
Enable Lazy Load for images
Select the “Lazy Load” setting for the image media type and set the animation to “Fade In.” This will allow images to smoothly appear as you scroll through the page.
Exclude Lazy Load for specific posts or pages
By selecting specific post types like “Pages” or “Blog” in the “Post Type” settings and specifying the pages to exclude (such as a specific landing page) in the “URL” settings, Lazy Load can be disabled for those pages.
Optimizing Performance
Set the script to load in the “Footer” to optimize page loading. Additionally, enabling Native Lazy Load can further improve performance on the browser side.
Lazy Load is highly effective for websites with a large amount of media, such as images and videos, where loading speed is crucial.
ryoTo elaborate, for example, the images at the very bottom of a blog will not load until the user scrolls down to them.
In particular, it provides significant benefits when you want to speed up the initial page load for users or target mobile users. Additionally, it helps reduce server load, making it ideal for high-traffic websites.
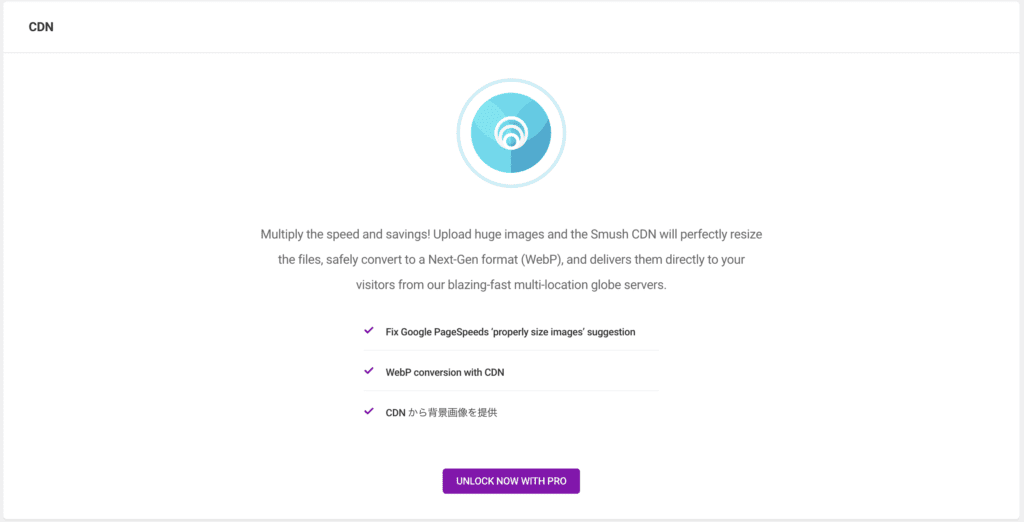
Explanation of Smush’s CDN(Pro version)

A CDN (Content Delivery Network) is a technology that uses multiple servers across the internet to deliver content to users quickly.
By distributing media files such as images and videos from a network of servers, it significantly improves the loading speed of a website.
 ryo
ryoIt’s a system that distributes a website’s data across servers around the world and delivers it quickly from the server closest to the user.
1.Sites with a lot of images
2. Sites that want to enhance SEO
3. Sites with global users
4. Sites aiming to improve performance
5. Sites seeking to reduce bandwidth and server load
6. Sites wanting to use next-generation image formats
*Since it is a paid version, the author has not been able to implement it.
The benefits of using a CDN
Speed Enhancement
By delivering images from servers distributed around the world, content reaches users quickly regardless of their location.
Bandwidth Savings
By providing optimized images, the load on the server is reduced, improving the website’s performance.
SEO-Friendly
Improving page load speed boosts Google’s SEO ranking.
 助手君
助手君It might be essential for websites that are accessed by people around the world.
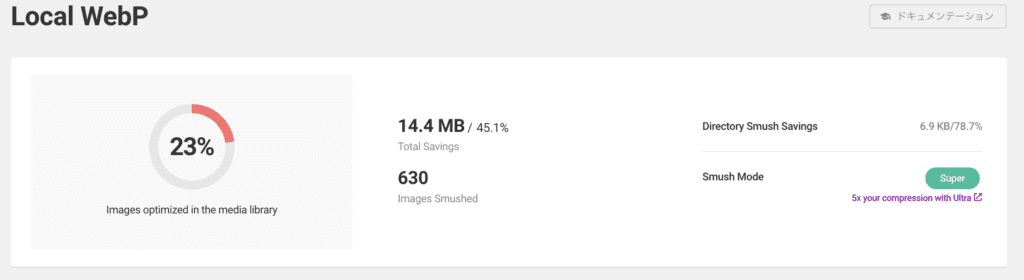
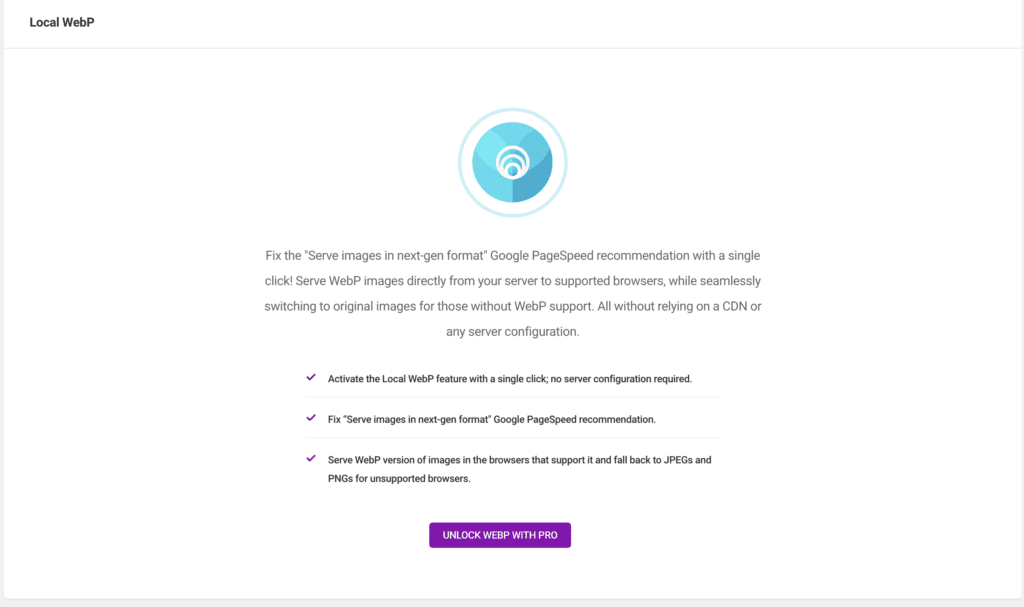
Explanation of Smush’s Local WebP(Pro version)
The Local WebP feature provides images in the WebP format, helping to meet Google’s PageSpeed Insights recommendation to “Serve images in next-gen format.”
WebP is a next-generation image format that offers smaller file sizes with the same quality, making it highly effective for improving website performance.
助手君It is a feature that converts images to the WebP format on the server and displays them.
1.Improve site page speed
2. Strengthen SEO measures
3. Optimization for mobile users
4. Sites with many images and diverse display environments
5. Use WebP without a CDN
6. Small-scale or personal sites with limited resources
7. Blogs or online shops that use many images
Main Features and Uses of Local WebP
Providing WebP Images
Compliance with Google PageSpeed Recommendations
“Serve images in next-gen format” is a Google recommendation to deliver images in next-gen formats like WebP, which improves page loading speed.
By using Smush’s Local WebP feature, you can easily comply with this recommendation.
Directly Serving WebP Images from the Server
Local WebP allows you to serve WebP images directly from your own server without using a CDN (Content Delivery Network).
This ensures that WebP images are provided to browsers that support WebP, while browsers that do not support WebP will automatically display the original JPEG or PNG images.
Easy Setup
To enable the Local WebP feature in Smush Pro, no special server settings or CDN setup are required.
The feature can be activated with a “one-click” setup, and you can immediately start serving images in WebP format to browsers that support it.
ryoIt’s great for blogs with a lot of images!
Smush’s Local WebP feature is especially useful when you want to improve the loading speed of sites with many images, strengthen SEO, or optimize for mobile.
Additionally, it can be easily set up without requiring technical expertise, allowing you to quickly implement it and enhance your site’s performance.
Explanation of Smush’s Integrations

Integrations allow you to connect with specific plugins and services, making image optimization even more convenient.
Here, we will explain in detail the integrations that Smush supports.
 助手君
助手君It might be easier to understand if we say it’s a system that connects different tools and makes them work together.
Integrations Settings Procedure
1.Gutenberg Support
2.Gravity Forms
3.WPBakery Page Builder
4.Amazon S3 (Pro)
5.NextGen Gallery (Pro)
1.Gutenberg Support

If you are using the Gutenberg block editor, you can directly check and manage the image compression status within the block itself.
When you enable Gutenberg Support, statistics and the “Manually Compress” button will appear within the Gutenberg block. This allows you to directly edit the images, check their compression status, and manually compress them if necessary.
2.Gravity Forms

If you are using a form that uploads images with Gravity Forms, the images will be automatically compressed, improving the form’s performance.
Install the Gravity Forms plugin and enable the “Gravity Forms Integration” in the Smush settings. This will automatically compress images uploaded via Gravity Forms.
助手君特に「フォームの画像を圧縮する必要がない」のであれば、Gravity Formsは基本的には不要だよ!
3.WPBakery Page Builder

If you are using WPBakery Page Builder to edit and resize images, Smush will automatically compress them, improving the page load speed.
Install the WPBakery Page Builder and enable the “WPBakery Page Builder Integration” in the Smush settings. This setting will ensure that images resized within WPBakery are also compressed by Smush.
ryoWPBakery Page Builder is a tool that allows you to easily create website layouts visually. The free version of Elementor is sufficient for most needs!
4.Amazon S3 (Pro)

Complete the setup for WP Offload Media and Amazon S3, then enable “Amazon S3 Support” in the Smush settings. This will automatically compress images stored on S3 (Pro version required).
5.NextGen Gallery (Pro)

Install NextGen Gallery and enable “NextGen Gallery Integration” in the Smush settings. This will ensure that the images used in NextGen Gallery are automatically compressed by Smush (Pro version required).
In other words, by using Smush’s integration features with specific plugins or services, you can efficiently compress and optimize images, improving your site’s performance.
ryoIt would be effective for those who want to integrate Google Analytics and Search Console with WordPress.
Smush Settings

By adjusting the settings appropriately, you can maximize the potential of Smush and efficiently compress images and improve performance.

1.General
2.Configs
3.Data & Settings
4.Accessibility
1.General (一般設定)
ryo“General” is the section where the basic operation of Smush is configured.
Image Resize Detection (画像サイズ検出)

Enabling this setting allows you to highlight images that are too large or too small for their container. However, this highlight is only visible to administrators and will not be displayed to visitors.
翻訳 (Translation)

Smush automatically applies translations based on the language set in the WordPress admin panel. Japanese is also supported.
使用状況の追跡 (Usage Tracking)

Smush anonymously sends usage data to help improve the plugin. It tracks which features are being used.
2.Configs (プリセット設定)
ryoIt’s a feature that allows you to save customized settings so they can be reused.
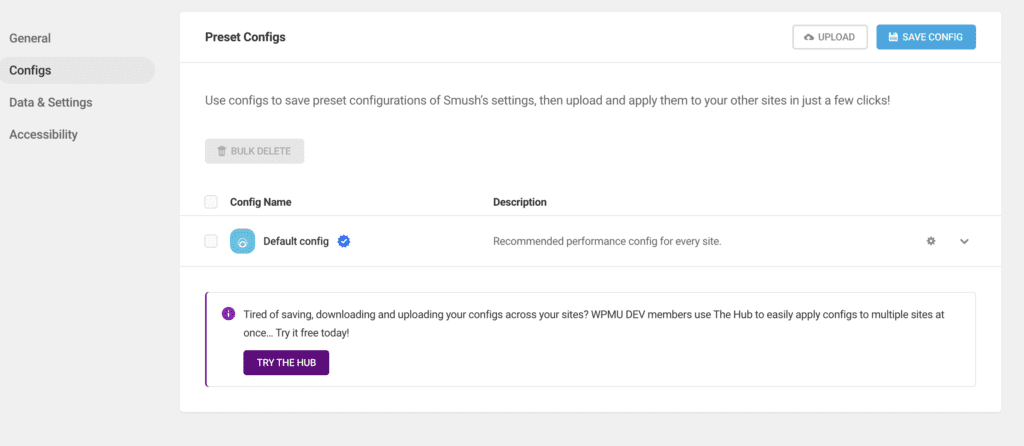
You can upload the saved settings and apply them to other sites at once.
There is also an option to delete the settings in bulk.
You can save preset settings with a name and apply them.
3.Data & Settings (データと設定)
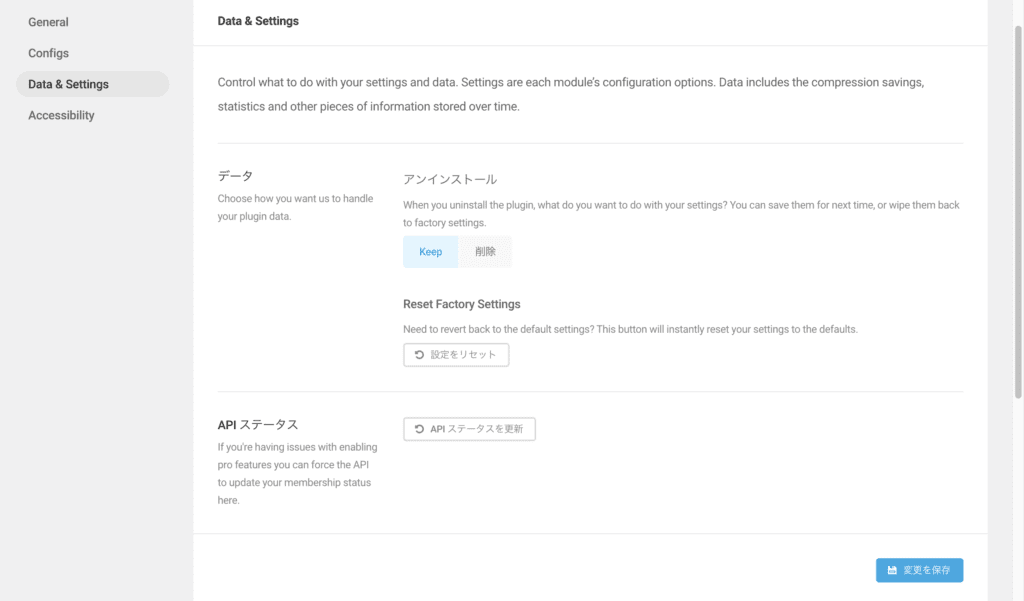
You can configure how the plugin handles data, including compression results, statistics, and more.
When uninstalling the plugin, you can choose whether to save the settings or completely delete them.
This is the option to reset the settings to their default state.
プロ機能を有効にする際に問題が発生した場合、APIのステータスを更新できます。
助手君It’s the management screen for Smush’s internal data and default settings!
4.Accessibility (アクセシビリティ)
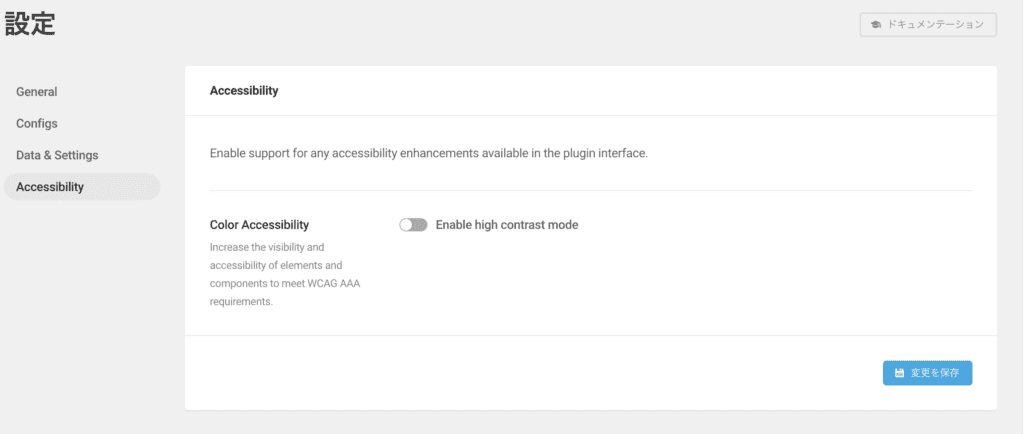
It enhances the visibility of elements and components, providing a display that complies with the WCAG AAA standards.
Enabling high contrast mode improves visual accessibility.
助手君You can configure features that improve accessibility (usability)!
Summary: Let’s Start Image Optimization with Smush!

That concludes the steps for image optimization using Smush.
ryoSmush is a plugin that compresses and optimizes images to speed up website loading times.
By using this plugin, you can significantly improve your website’s speed and also boost SEO. At first, you might feel a bit confused by the settings and how to use it, but as you try each step, you’ll surely get the hang of it.
What do you think? With Smush, your site’s loading speed will improve, and the SEO benefits will be great as well. If you haven’t optimized your images yet, start by installing Smush for free!
Be sure to use this article as a reference to make your site even more efficient!